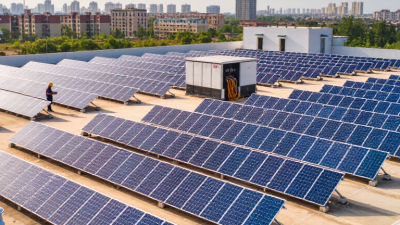
Solar Panel Removal and Reinstall for Roof Replacement in Florida
If you’re replacing your roof and already have solar panels installed, you’ll likely need solar panel removal and reinstall during the process. When planned correctly,

Solar energy is no longer a distant promise. It is working on rooftops, farms, schools, and small businesses worldwide. Yet installing panels does not guarantee maximum output. Shade from a growing tree, dust on glass, poor ventilation, or a misaligned inverter can quietly reduce daily production. These details matter.
Fatih Birol, Executive Director of the International Energy Agency, has stated, “Solar PV is now the cheapest source of electricity in history.” His observation highlights solar power’s economic strength, but affordability alone does not ensure strong performance. Solar Energy Production depends on thoughtful design, local weather, equipment quality, and regular observation. A panel facing morning shade may lose valuable energy before noon. A hot roof can also lower panel efficiency, even under bright sunlight.
This guide presents ten practical tips to maximize Solar Energy Production. It examines panel orientation, tilt, shading, cleaning, ventilation, inverter selection, monitoring, and maintenance. Each recommendation connects technical knowledge with visible, real-world conditions. Look for dust along panel edges. Watch for sudden drops on the monitoring screen. Small clues can reveal larger problems.
No system is perfect. Site conditions differ. Some advice may need adjustment after installation. That uncertainty deserves attention, not embarrassment. Experienced installers still reassess designs when trees grow, weather patterns shift, or electricity needs change. The goal is not chasing an unrealistic peak every day. It is building a reliable system that captures more sunlight, wastes less energy, and performs consistently across changing seasons.
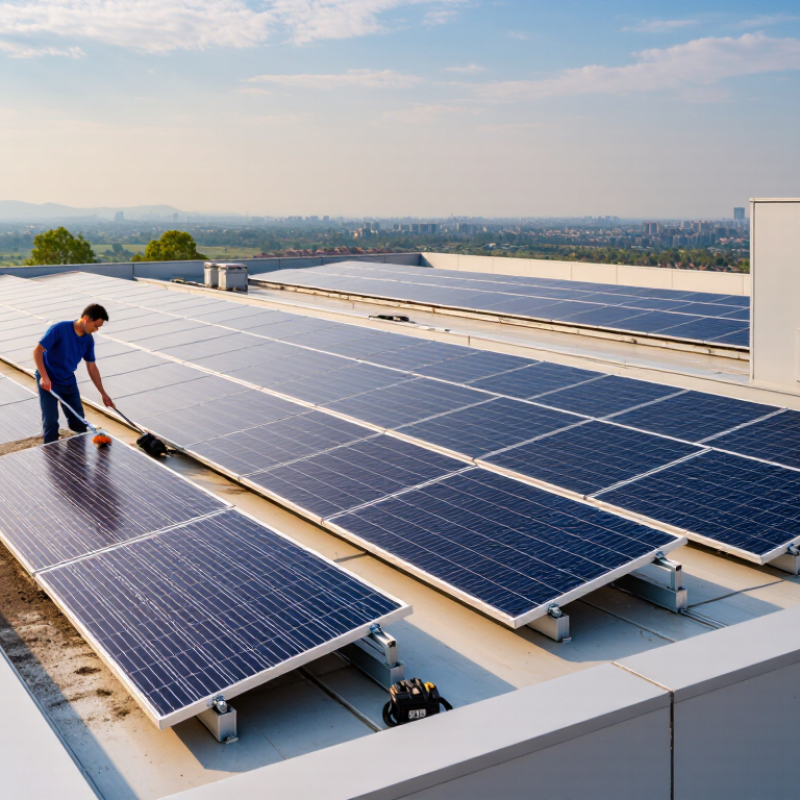
Assessing your site’s solar potential starts with observing the roof throughout the day. Track shadows from trees, chimneys, walls, and nearby buildings. A sunny roof at noon may lose valuable light in the morning or afternoon. Seasonal changes matter too. Bare branches in winter can hide summer shading patterns.
Measure roof orientation, usable area, and slope before estimating system size. A compass or mapping app can provide a useful starting point, but neither replaces an on-site inspection. Check your electricity bills from different seasons, because summer and winter demand may differ sharply. Local solar radiation data can improve the estimate, while a qualified installer should verify structural strength, wiring routes, and safe equipment placement.
Small details affect production. Dust, leaves, bird activity, and snow can reduce output across several panels. Ventilation gaps and clear access also support safer maintenance. My early estimates were too optimistic because I ignored late-afternoon shade from a neighboring building. That mistake changed the expected annual yield. Measure more than once. Use a shade analysis tool when possible, and compare its results with real observations. Roof space is not always usable space. Some areas may contain vents, fragile surfaces, or difficult access points. Record these limitations honestly before choosing panel capacity.
Choosing panels begins with the roof, not the product brochure. In the northern hemisphere, face modules toward true south when possible. In the southern hemisphere, true north usually performs better. Magnetic compasses can mislead near metal structures. Use a site survey or solar path tool. NREL’s PVWatts documentation treats tilt near local latitude as a useful starting point. That is only a starting point. A 30-degree roof may outperform a theoretical angle when installation stays cleaner and safer. According to IRENA’s Renewable Capacity Statistics 2024, solar capacity expanded by roughly 345 GW during 2023. More panels make placement discipline more important.
Walk the roof at different hours. Look for chimneys, parapets, trees, antennas, and future tree growth. A narrow shadow across one panel can reduce output from an entire string. Keep rows spaced so winter shadows do not touch the next row. Leave access paths for inspection. On flat roofs, use low-profile mounting when wind and drainage allow. Do not assume a steep tilt always wins. More tilt can increase wind loading and self-shading. NREL’s PVWatts model uses a 14% default total-system-loss assumption. Real losses can differ sharply with dust, temperature, wiring, and mismatch. That number is not a promise.
Choose panel electrical characteristics after mapping sunlight. Panels should share similar orientation and tilt within each string. Split east and west roof faces across separate electrical inputs. A professional installer should model hourly shading, not only annual sun hours. Request the assumptions in writing. Check the roof’s age before adding weight. Replacing an old roof later can require expensive panel removal. The imperfect choice may be the practical one. I would accept slightly lower modeled production if it improves access, drainage, and maintenance. Ignoring those details looks efficient on paper, but often is not.
Panel orientation has a major effect on annual solar production. In the Northern Hemisphere, a south-facing panel tilted toward the local latitude is commonly used as the benchmark. Southeast and southwest orientations can produce nearly similar results, while east- and west-facing panels generally generate less annual energy. The percentages shown are representative planning values and vary with location, roof angle, shading, and weather.
10 Tips to Maximize Solar Energy Production
Panel orientation, tilt, and spacing shape daily energy production more than many homeowners expect. In the northern hemisphere, panels usually perform best when facing true south. Magnetic south can differ by several degrees. Use a site survey, not a phone compass alone. In the southern hemisphere, a north-facing arrangement is often more effective. Nearby roofs, chimneys, and trees still deserve careful attention.
Tilt should reflect both latitude and seasonal sunlight. A fixed system often uses a tilt close to the site’s latitude, but the best angle depends on energy goals. A steeper angle can improve winter production and help snow slide away. A lower angle may support stronger summer output. Local weather matters. Dust, rain, and wind can change the practical result. Small adjustments may outperform a rigid rule.
Spacing prevents one panel row from shading another, especially during winter mornings and afternoons. Leave enough distance for maintenance access and safe cleaning. A simple shadow study should check the sun’s position across the year. I have seen layouts that looked excellent at noon but lost power by 3 p.m. That mistake is easy to miss. A perfectly optimized layout is rarely possible on a real roof. Recheck the design after nearby trees grow or new structures appear.
Practical design and operating guidance for improving photovoltaic system performance
| No. | Optimization Area | Recommended Practice | Typical Reference Value | Why It Matters |
|---|---|---|---|---|
| 1 | Choose the Best Orientation | Face the array toward the equator: generally south in the Northern Hemisphere and north in the Southern Hemisphere. | Aim within approximately ±15° of the equator-facing direction when practical. | The array receives more annual sunlight when its surface is directed toward the sun’s average path. |
| 2 | Set an Appropriate Tilt | Use a fixed tilt close to the site latitude, then adjust for local weather, roof limitations, and energy priorities. | A common starting point is latitude ±10°. | Tilt affects the angle of incidence, drainage, snow shedding, and seasonal solar capture. |
| 3 | Account for Seasonal Production | For adjustable systems, use a steeper winter angle and a shallower summer angle where the additional labor is justified. | Seasonal adjustment is often approximately ±10° to ±15° from the fixed annual setting. | The sun is lower in winter and higher in summer, so the optimum angle changes throughout the year. |
| 4 | Minimize Row-to-Row Shading | Calculate row pitch using the winter solar path and the project’s acceptable shading limit. | Use a solar-shading study; many designs target less than 2% to 5% annual shading loss. | Shadows can reduce output disproportionately because cells in a series string may limit current. |
| 5 | Avoid Obstructions | Check trees, parapets, HVAC equipment, nearby buildings, vents, and future vegetation growth before installation. | Keep the active array clear during the key production hours, especially from 9:00 a.m. to 3:00 p.m. solar time. | Even partial shade can cause mismatch losses and reduce the output of affected modules or strings. |
| 6 | Provide Adequate Ventilation | Maintain an open air gap behind roof-mounted modules and avoid blocking natural airflow. | Follow the mounting system’s requirements; a rear gap of roughly 10 cm or more is common for pitched-roof installations. | Crystalline silicon modules commonly lose about 0.3% to 0.5% of power per °C above their rated cell temperature. |
| 7 | Keep Modules Clean | Inspect for dust, bird droppings, pollen, leaves, and industrial deposits; clean when soiling causes a measurable loss. | A practical inspection interval is every 6 to 12 months, adjusted for local conditions. | Soiling losses vary widely; a few percent is common, while dusty or dry locations can experience substantially higher losses. |
| 8 | Match Electrical Layouts | Group modules with similar orientation, tilt, and shading conditions on the same electrical input where possible. | Use separate maximum-power-point tracking inputs for significantly different roof planes. | Electrical mismatch reduces the ability of the system to operate each group at its best operating point. |
| 9 | Size the Inverter Carefully | Balance the direct-current array size with inverter capacity, local irradiance, temperature, clipping tolerance, and grid requirements. | A DC-to-AC ratio around 1.1 to 1.4 is commonly evaluated, but it must be confirmed by site modeling. | A moderately oversized array can improve morning, evening, and low-light production, while excessive oversizing increases clipping. |
| 10 | Monitor and Maintain Performance | Track daily energy, specific yield, inverter status, weather conditions, and year-over-year changes; investigate sudden deviations. | Review performance monthly and arrange a detailed inspection at least annually. | Monitoring helps identify shading growth, soiling, equipment faults, communication failures, and gradual degradation early. |
In my experience, clean solar panels produce more consistent results. Fine dust, pollen, and bird droppings can form a dull film that reduces incoming light. Inspect them every few months, especially after dry weather or nearby construction. Look closely. Use binoculars from the ground when roof access is unsafe. For stubborn dirt, a soft brush and clean water are usually safer than abrasive tools. Never scrub hot glass.
Shading deserves equal attention. Track shadows from trees, chimneys, railings, and new structures at different times of day. A branch may shade one panel yet affect output from its connected section. I once underestimated a young tree; its narrow shadow became much wider by late afternoon. That mistake showed me why seasonal checks matter. Trim vegetation carefully, keeping clear of wiring and roof edges. Do not cut large limbs near panels yourself. A qualified worker can manage those risks.
Watch the energy monitor before and after cleaning or trimming. Compare similar sunny days, not cloudy mornings with clear afternoons. Sudden drops may indicate dirt, shading, loose connections, or equipment faults. Cleaning too often can waste water, while ignoring buildup can waste more energy. Keep a simple dated record of weather, maintenance, and production. It helps separate a real problem from a normal seasonal change.
Solar output improves when you measure it, not when you guess. During a site check, I compare daily production with sunlight hours and household demand. A sudden drop often points to shade, dust, loose wiring, or inverter alerts. Check the monitoring portal each morning. Record unusual readings in a simple log. Small patterns matter. However, one cloudy day proves little. Weather changes can make healthy panels appear weak, so compare several clear days before requesting repairs.
Walk around the array monthly, preferably after sunrise or before sunset. Look for leaves, bird debris, cracked glass, and new shadows from growing trees. Never climb onto panels without proper training. A qualified technician should inspect electrical connections and roof access. Gentle cleaning may help in dusty areas, but excessive washing wastes water and can damage surfaces. I once blamed dirt for low output; the real problem was afternoon shade from a recently installed structure. That mistake changed my inspection routine.
Efficiency also depends on when electricity is used. Run flexible appliances near midday, when solar production is usually strongest. Keep vents clear around equipment, and review standby loads at night. A smart meter can reveal consumption that remains invisible during busy days. Set realistic targets, such as reducing evening demand by ten percent. Do not trust every automated recommendation. Some systems estimate savings from incomplete data, and my own first-month forecast was too optimistic. Recheck results after seasonal changes, maintenance, and major household adjustments.

If you’re replacing your roof and already have solar panels installed, you’ll likely need solar panel removal and reinstall during the process. When planned correctly,
Florida homeowners are seeing their power bills rise faster than ever. Between AI data centers, fuel costs, and storm-related grid upgrades, utilities are increasing rates

⏳Go Solar Before the Deadline Permitting in Pinellas County solar jurisdictions is already experiencing serious delays. Plan reviews are running 4+ weeks behind. That means

NABCEP Certified
PV Installer

Licensed &
Insured

Systems Engineered
For A 25 Year Life Cycle

Over 4 Megawatts
Of Solar Installed

Expert Service In The
Unlikely Event Of
An Issue
Florida Power Services
"The Solar Power Company"
Florida Power Services
"The Solar Power Company"
based on 62 reviews
Florida Power Services
"The Solar Power Company"
based on 33 reviews


Utility rates rise 4–6% every year. Solar converts that rising expense into an asset that can pay for itself, and once it’s paid off, your power is essentially free. Many property owners qualify with no money out of pocket.